
UK Kitchen Extensions: Fully Explained
Kitchen Extensions: Planning, Building Regs, Structure, Services & Layout — The Complete Guide
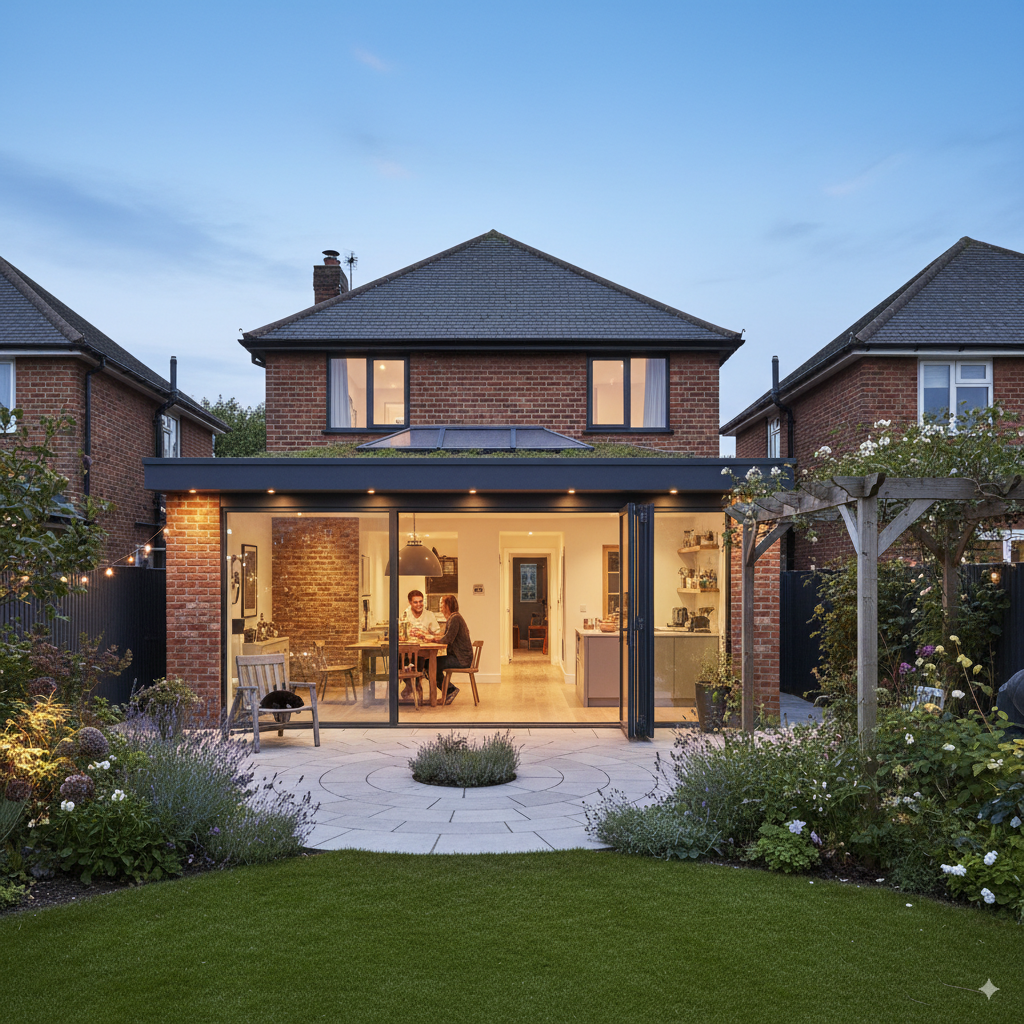
A well-planned kitchen extension turns a cramped galley into the heart of the home: light, social, practical, and built for everyday cooking as well as entertaining. Done right, it flies through approvals, feels comfortable all year, and is a joy to work in. Done poorly, it overheats, extracts badly, and bottlenecks circulation. This guide maps the safest route from first sketch to final snag.
What makes a great kitchen extension?
Flow first: clear routes from entrance to garden without slicing through the cook zone.
Light where you need it: daylight over prep and sink; task lighting where daylight falls short.
Workable services: short, logical runs for drainage, ventilation and electrics; future maintenance in mind.
Comfort & acoustics: warm slab, controlled ventilation, balanced sound in a lively space.
Approvals-friendly massing: depth, height and neighbour amenity considered before you draw elevations.
Planning permission vs Permitted Development (PD)
Most kitchen extensions are single-storey rear or side-return additions and many qualify for householder PD if they meet national limits/conditions. Key points (simplified):
Rear extensions under PD: limited depth and height; materials broadly similar to the host dwelling; no building forward of the principal elevation.
Larger home extensions (“prior approval”): for some houses you can extend deeper than standard PD limits via a neighbour-consultation route (commonly up to 6 m for semis/terraces and 8 m for detached), subject to criteria.
Side-return extensions: single-storey side additions may be PD if they meet height/width limits and don’t extend beyond the principal elevation.
Designated land / Article 4: in conservation areas, AONBs, National Parks or where Article 4 directions apply, PD may be limited or removed.
Flats/maisonettes: PD rules for houses don’t apply.
If you’re inside PD, consider applying for a Lawful Development Certificate for certainty. If your brief needs more depth/height or tweaks the façade materially, a householder planning application is the right route. Always measure from the original house (as first built / at the base date), not from later additions.
Building Regulations — what Building Control will check
Kitchen extensions always trigger Building Regs. Expect checks on:
Part A (Structure): foundations sized to ground; beam/lintel design for knock-throughs; stability during temporary works; wall ties, straps and bearings/padstones.
Part B (Fire): cavity barriers, fire-stopping, alarms; escape considerations for rooms off the kitchen; boundary fire separation for walls/ eaves near the boundary.
Part C (Moisture): DPC/DPM continuity; cavity trays/weep holes at abutments; robust flashing details; condensation control.
Part E (Sound): party elements in semis/terraces; acoustic quality inside open-plan spaces.
Part F (Ventilation): kitchen mechanical extract to outside (no recirculation as sole method), background ventilation, purge ventilation; whole-dwelling rates if the envelope is tightened.
Part G (Sanitation/Hot Water): safe hot water delivery/temperatures, appliance connections.
Part H (Drainage): new foul and surface water runs, rodding access, manholes kept outside the footprint; SuDS attention for increased impermeable area.
Part K (Protection from falling/impact): doors/thresholds/steps; safety glazing where required.
Part L (Energy): U-values for walls/roof/floor, window/door performance, thermal bridge treatment, and SAP/area-weighted compliance.
Part M (Access): reasonable provision—thresholds/clear widths.
Part P (Electrics): notifiable works; certification at completion.
Extension types & massing that behave
Rear extension (straight back): simplest mass; coordinate roof form (lean-to/cat-slide or warm flat roof with skylights).
Side-return (infill): transforms Victorian/Edwardian layouts; watch overshadowing to neighbours; add rooflights near the party wall to pull light into the middle.
Wrap-around: powerful but massy; keep the rear portion subservient with setbacks, varied roof heights, or rooflights to relieve bulk.
Orangery/top-light strategies: roof lanterns or a chain of smaller rooflights over the island to light the plan centre without glare.
Neighbour amenity tests to pass early
45-degree/25-degree checks to nearest habitable windows.
Manage sense of enclosure: step down eaves or use hipped/ chamfered corners near boundaries.
Avoid direct overlooking into main neighbour garden sitting areas.
Structure & knock-throughs: beams, frames and sequencing
Opening the back of the house for a big kitchen-diner typically means removing load-bearing walls:
Beams/frames: RSJs/UBs sized for span and load (including roof and any rooms over); large openings often need goalpost/box frames; check deflection limits so doors don’t bind.
Bearings & padstones: provide adequate bearing (often ≥100 mm) on sound masonry with padstones; avoid perching on weak stub walls.
Temporary works: needle-propping and phased demolition—don’t skimp on sequencing.
Lateral restraint: re-establish straps and shear panels; when walls disappear, the floor/roof must still resist wind loads.
Steel & cold bridges: insulate around steels that pass to the cold side; specify thermal breaks where practical.
Foundations & levels: trench, piles/raft & build-over realities
Trench-fill/strip on competent ground is common.
Piles + ground beams or a raft help where trenches collapse, depths are excessive (trees/shrinkable clay), or ground is variable.
Sewers: rear gardens commonly host public sewers/laterals—if you’re within typical 3 m corridors or over a sewer, expect a build-over/near application and protective details; do not enclose manholes inside.
Finished floor levels (FFL): set FFL early to align with the existing house and achieve flush thresholds to the garden; coordinate door sill drainage and patio falls.
Moisture, insulation & airtightness — comfort built in
DPM/DPC: lap DPM to DPCs; maintain continuous moisture barriers through thresholds and around posts/frames.
Thermal continuity: treat floor-wall and wall-roof junctions; insulated cavity closers at all openings; detail around steel penetrations.
Airtightness: define an air-barrier line; seal around windows/doors with tapes; seal service penetrations; coordinate with MVHR/MEV where used.
Condensation control: warm roof for flat roofs; ventilated voids only where correctly detailed.
Services: the kitchen is an MEP project (treat it like one)
Extraction & ventilation (Part F critical)
Duct to outside: avoid recirculating hoods as the sole method.
Duct size/route: short, straight, smooth-bore ducts perform; keep bends gentle; avoid terminating in the roof void.
Make-up air: large extract + tight envelope needs background air; plan trickle vents and cross-ventilation.
Gas & cooking safety
Respect clearances to hobs from wall units and combustibles; coordinate splashbacks.
Gas hobs: provide adequate ventilation; ensure pipe routes are serviceable and protected.
Induction: great for air quality and control; check electrical capacity and circuiting.
Electrics (Part P)
Dedicated circuits: ovens, induction hobs, dishwashers, boiling-water taps; RCD protection.
Zones around sinks; IP-rated fittings in wet zones; plenty of worktop sockets and island floor boxes (planned before screed).
Data: hard-wire for rock-solid streaming/work-from-home.
Heating & hot water
UFH in the new slab is ideal for kitchens; zone it for control.
Check boiler/heat pump capacity after adding space; consider a hot-water strategy for new fixtures (flow rates, recovery).
Summer comfort: pair UFH with natural ventilation or consider a small air-to-air heat pump if solar gains are high.
Water & waste
Keep waste runs short with proper falls; give rodding access.
Island sinks need planned below-slab routes or a raised floor zone; avoid long, tortuous runs.
Drainage, SuDS & external works
Foul: relocate any internal manholes outside; maintain access; coordinate new appliance wastes.
Surface water: oversite drainage, roof outlet sizing, soakaways where appropriate; consider permeable paving/rain-garden planters when increasing hard surfaces.
Thresholds: channel drains at big sliders; protect sills from ponding; set patio falls away from the house.
Daylight, glazing & overheating (design it now, not on site)
Rooflights/lanterns: bring light deep into plan; place above prep/island; avoid glare with baffles/blinds if strongly south/west facing.
Big sliders: wonderful, but plan solar control and/or shading; coordinate beam depth and flush threshold details.
Cross-ventilation: pair openings on different façades where possible to purge heat fast.
Reflectance: light internal finishes and splashbacks can bounce daylight deep into the room.
Kitchen ergonomics: numbers that make spaces work
Clearances & circulation
Between parallel runs: target 1000–1100 mm; 1200 mm if two cooks regularly.
Around islands: 1000–1200 mm all round; ≥1100 mm where dishwashers/ ovens open opposite.
Seating at islands: 300–350 mm knee overhang; 600 mm width per stool.
Work zones
Think zones (prep, cook, clean, store) rather than the old “triangle”. Keep sink–dishwasher–bin tight; give landing space either side of the hob and near the fridge.
Tall banks: group ovens/fridge/pantry to one side to keep runs calm.
Appliance ventilation: honour manufacturer clearances for fridges/ovens to avoid overheating.
Details that add quality
Task lighting under wall units/shelves; pendants over islands (glare-free); ambient wash for evenings.
Acoustics: soft materials (rugs, curtains, upholstered seating) and mineral wool in internal partitions to tame clatter.
Power where you need it: pop-ups sparingly; prefer discreet sockets in gable panels or the end of islands.
Party Wall etc. Act 1996 — common kitchen triggers
You may need to serve notice if you:
Excavate for foundations within 3 m of a neighbour and deeper than their foundations (or within 6 m under specific depth conditions),
Build a new wall on/at the boundary, or
Cut into/raise a party wall (e.g., to insert steelwork or flashings).
Include foundation sections and beam details with notices to smooth agreements; allow time for an Award if neighbours dissent.
Costs, timelines & procurement
Indicative programme
Survey + concept + planning/LDC: 3–8 weeks (add ~8 weeks for a planning decision if needed, or prior approval timescales for larger home extensions).
Technical design & Building Control: 2–6 weeks.
On-site build: 8–16+ weeks depending on structure, glazing lead times, and finishes.
Key cost drivers
Structural steel scale; foundation type (deep trenches vs piles/raft); glazing size/spec; kitchen fit-out quality; services complexity (UFH, ventilation plant); drainage diversions/build-over; external works and patios.
Procurement
Traditional tender with drawings + specification + schedules (windows/doors, kitchen, finishes), or design-and-build with clear Employer’s Requirements.
Lock down appliance models early—MEP coordination depends on them.
14) Common pitfalls (and how to dodge them)
Extractor dead-ends: long, kinked ducts → poor performance. Plan the route on day one.
Manhole under the island: discovered late. Survey drains and relocate externally early.
Cold bridges around steels: condensation at beams. Insulate & detail steel penetrations.
Overheating: huge west-facing glass without shading. Solar control + cross-vent.
Headroom lost: over-thick build-ups or deep beams. Coordinate structure with desired ceiling lines.
Island too close: doors clash, stools jam circulation. Stick to the clearances.
Services afterthought: no power/water to island, no data in dining area. Plan MEP at concept stage.
Party Wall left late: notices served when the digger arrives. Start during technical design.
Step-by-step workflow we recommend
Feasibility & constraints — PD vs planning/prior approval, Article 4, conservation, neighbour tests, drains/sewers, trees, parking if relevant.
Measured survey — plans/levels; note drains/manholes, meters, downpipes, boiler, consumer unit.
Concept options — massing, roof form, daylight strategy, MEP routes; run amenity tests.
Planning/LDC/prior approval — choose the correct route; assemble a clean, policy-aware pack.
Structure — beam/goalpost design, foundations (trench vs piles/raft), temporary works plan.
Technical design — junction details, U-values, membranes/VCL, extraction route, drainage, power/data, UFH zoning, appliance cut-sheets.
Party Wall & build-over — serve/apply early with clear sections.
Tender & contract — drawings/specs/schedules; programme milestones.
Build & inspections — photograph concealed works (membranes/insulation/steel bearings), keep certificates.
Completion — snag, Building Control completion, O&M pack (as-builts, manuals, warranties).
FAQs
Do I need planning for a standard rear kitchen extension?
Often no if within PD limits or via the larger home extension prior-approval route, but check conservation/Article 4 and measure from the original house.
Can I ventilate the cooker hood through the rooflight?
No—plan a proper duct to outside with sensible diameter and short, straight routing.
Can I keep the existing manhole inside the new kitchen?
No—relocate externally or reroute; Building Control expects accessible chambers outside the footprint.
What clearance do I need around an island?
Aim for 1000–1200 mm all round; 1200 mm is comfortable for two people working.
Is UFH worth it in a kitchen?
Yes—paired with a well-insulated slab and good controls, it frees wall space and gives even comfort.
Next steps
Share your address, brief (island vs peninsular, glazing goals, appliances), and any past plans. We’ll confirm planning route, map MEP/vent routes, set structure/foundation strategy, and produce planning + Building Regs drawings with crisp junction details—so your kitchen cooks beautifully on paper and on site.

Quick Links
Get In Touch
Building 13, Thames Enterprise Centre, Princess Margaret Road, East Tilbury, Essex, RM18 8RH
- Phone: 0800 494 7023
- Hours: Mon-Fri 8:30AM - 5:30PM
Get In Touch
Building 13, Thames Enterprise Centre, Princess Margaret Road, East Tilbury, Essex, RM18 8RH
- Phone: 0800 494 7023
- Hours: Mon-Fri 8:30AM - 5:30PM